Getting Started With TIO Python
(macOS/LINUX)
Installing TIO
First, install (or upgrade) Twinleaf's Python package using the command
% pip3 install tio --upgrade
If you are using Linux, you may need to completely log out and log back in after this command. The code used to create our TIO package can be found on GitHub under Twinleaf Python Tools.
Once you have installed TIO, there are several programs to help you communicate with your device. The two most useful programs are itio and tiomon. itio is useful for setting and viewing values such as temperature or calibration on your device. tiomon is used to monitor those values in a live stream.
Livestream Data with tiomon
To monitor the device data, use the command
% tiomon
If a ConnectionRefusedError appears and the sensor is connected via usb, you will need to specify the connection type for tiomon. To avoid having to continuously specify the connection type, consider setting up a proxy server. Instructions for this can be found in our Getting Started With TIO Tools page. The command format will look like:
% tiomon /dev/[usb-path]
where [usb-path] should be replaced by the specific usb type and serial number. For macOS, the [usb-path] will look like /cu.usbXXXXXX. For Linux, it will look like /ttyUSB0 or /ttyACM0.
These commands only work if the sensor is already connected to your machine. An example display is shown below. To stop the display, use Ctrl-C.
VMR - Twinleaf VMR R12 N171 [2021-03-16/c7c589]
vector.x -1.178e+04 🕙 20.02 Hz [                                                    ]
vector.y  7.304e+04 🕙 20.02 Hz [################################################### ]
vector.z  2.171e+04 🕙 20.02 Hz [################################################### ]
accel.x      0.4324 🕙 20.02 Hz [###############################################     ]
accel.y       9.878 🕙 20.02 Hz [################################################### ]
accel.z      0.2326 🕙 20.02 Hz [#############################################       ]
gyro.x    2.609e-05 🕙 20.02 Hz [##########################################          ]
gyro.y     0.009106 🕙 20.02 Hz [####################################                ]
gyro.z     0.009131 🕙 20.02 Hz [#################                                   ]
bar            1014 🕙 20.02 Hz [################################################### ]
Communication with itio
itio provides a way to set different values related to your device. To start itio, type the following into the command line:
% itio /dev/[usb-path]
where [usb-path] should be replaced by the specific usb type and serial number (again, to avoid having to repeatedly specify the usb path, set up a proxy server with tio-tools). After you run this command, the terminal window should look like the example below. From here, you can set and change different values for your device with command line functions. All commands will start with tio. and will then change based on which device you are using.
% itio
VMR - Twinleaf VMR R12 N171 [2021-03-16/c7c589]

Use   : tio.<tab>
In [1]: tio.vmr.vector()
Out[1]: [94424.7890625, -9569.669921875, 67310.921875]
Communicating with Python Scripts
You can also communicate with your device via Python scripts with our Python tldevice module. To access your device via Python, first import the tldevice module and then make an instance of the Device() class. See below for reference.
>>> import tldevice
>>> device = tldevice.Device(“/dev/[usb-path]")
Here, [usb-path] will be replaced with the specific USB path for your setup. From here, you can set and change different values for your device with function specific to your device.
An example call for a VMR might be:
>>> device.vector()
[-12165.42578125, 75574.84375, 22488.146484375]
which returns the magnetic field in x, y, and z.
Troubleshooting
-
If you run into any command not found errors on Linux, try to log out of your account and log back in.
-
Linux will attempt to connect with the sensor to determine if it is a modem. On systemd systems like Ubuntu, disable ModemManager using
sudo apt remove modemmanager. To access serial ports without superuser access usesudo usermod -a -G dialout $USERand on WSL you may needsudo usermod -a -G tty $USER.
Windows
Installing TIO and Getting Port Path
First, install (or upgrade) Twinleaf's Python package using the command
% pip3 install tio --upgrade
Adding to PATH
If you get a PATH warning, you will need to add pip's installation directory to your PATH. If the warning appears with the directory to add to the PATH, copy the directory. If there is no warning, but later on you receive a command not found error when trying to run itio, you might have the same issue and will need to find the directory to add to your PATH.
To find the directory:
- Open File Finder.
- Inside File Finder, search for "itio" in the search bar. This will take a few seconds.
- Once you see the results, look for a result that says
itioand has "Type: Application". - Right click on this result and click "Open file location". This should open a file containing a list of Python applications such as itio and tiomon.
- Then, click the bar at the top of File Finder to highlight the folder's directory and copy it.
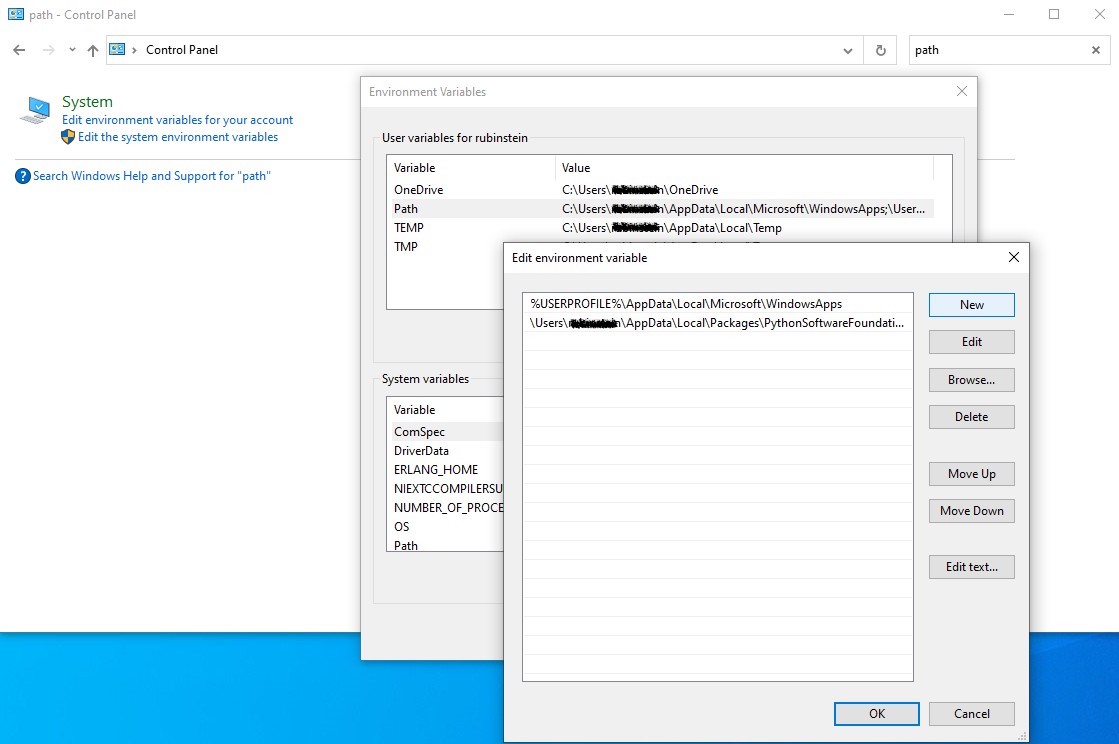
To add the saved directory to your PATH, open Control Panel. Once inside Control Panel, search "Path" in the search bar. Then, click the line that says "Edit environment variables for your account". This will open a new window with a list of environment variables. Double click on Path to open another window. Click "New" on the upper right corner of the new window. Then, paste the copied installation directory and save. See the screenshot below for reference.
Finding COM Number
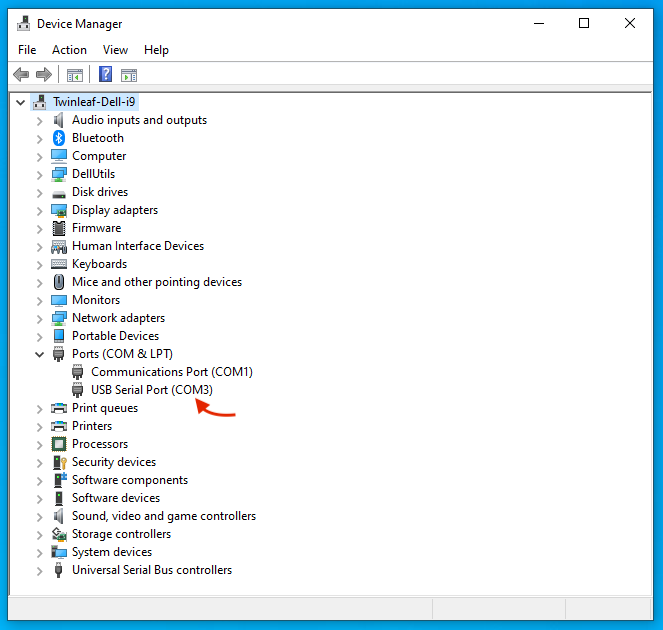
Once you have plugged your device into your computer via USB, you will need to find the COM number specific to your connection setup. To do this, visit Device Manager and then Ports on your computer. Under Ports, you should see a USB Serial Port listed. Next to the listing should be a COM number in parentheses. See the screenshot below for reference (in our setup, it was COM3).
Communicating with itio
Once you have found the COM number, you can use itio to communicate with your device. Type
% itio COMx
into your shell. If you get a command not found error, it might mean you need to add tio's installation directory to your PATH.
Once you run itio COMx, the shell should look like the following (in this example, the device is a VMR, but in your setup it will list your device):
% itio
VMR - Twinleaf VMR R12 N171 [2021-03-16/c7c589]

Use   : tio.<tab>
In [1]:
From here, you can set and change different values for your device with command line functions. All commands will start with tio. and will then change based on which device you are using. To see the specific commands for your device, visit the instructions page for your device.
Communicating with Python Scripts
You can also communicate with your device via Python scripts with our Python tldevice module. To access your device via Python, first import the tldevice module and then make an instance of the Device() class. See below for reference.
>>> import tldevice
>>> device = tldevice.Device(“COMx")
Here, x will be repaced by the COM number you found in Device Manager. From here, you can set and change different values for your device with function specific to your device. To see the specific commands for your device, visit the instructions page for your device.
An example call for a VMR might be:
>>> device.vector()
which returns the magnetic field in x, y, and z.
Troubleshooting
-
The serial-USB adapter uses FTDI drivers that may not be installed by default.
-
If your mouse pointer goes crazy: If a windows computer is rebooted with a sensor plugged in, it can sometimes determine that the sensor is a serial mouse. It is possible to disable this in the registry.
-
If you run into an error installing packages on Windows, you may need to enable long paths.