A Twinleaf I/O Tooling Walkthrough
In order to help guide you through using Twinleaf I/O tools with your device, this page describes an example walkthrough of tools and commands for typical use.
To start, we plug our device into a computer using a usb cable. In this example, we are using a VMR.
Once our device is plugged into the computer, we set up a proxy server. To install our tio-proxy tool, see our Getting Started With TIO Tools page. Please note that you do not have to set up a proxy server and can just connect directly, but it allows multiple clients to connect to the device and removes the need to specify the connection port while using our Python tools and C library. Please also note that tio-proxy does not work on Windows computers unless you are using WSL. Once tio-tools is cloned and installed, we start the proxy with:
% tio-proxy /dev/cu.usbserial-DT04H6OM
Here, cu.usbserial-DT04H6OM is specific to our setup and depends on serial number, operating system, and device used (for this example, we used a VMR on macOS). On macOS, it will look similar to our example in the form tio-proxy /dev/cu.usbXXXXXX. It is convenient to type cu.usb and then tab autocomplete to find the serial number.
On Linux, it will look like
% tio-proxy /dev/ttyUSB0 or % tio-proxy /dev/ttyACM0
On WSL, it will look like
% tio-proxy /dev/ttyS3 for COM3.
Leave the proxy server running and open a new terminal window to continue.
Using itio and tiomon
With the proxy server running, we can use Twinleaf's Python tools to communicate with our device. Make sure you have Twinleaf's TIO Python package installed before trying this. Instructions for installation can be found on our Getting Started With TIO Python page. We first run
% itio
In this walkthrough, we are using a VMR sensor, as shown in the example display below. Once inside itio, there are a number of different functions to call to communicate with your device. For example, with a VMR, we might want to see the magnetic field in x, y, and z. To do this, we type tio.vmr.vector() into our itio interface and hit enter. See the example below for reference.
    % itio

    VMR - Twinleaf VMR R12 N171 [2021-03-16/c7c589]


    Use   : tio.<tab>

    In [1]: tio.vmr.vector()

    Out[1]: [94424.7890625, -9569.669921875, 67310.921875]
To see the different commands for your device, visit the command line reference page for your device.
Additionally, you can type tio into the itio interface and hit tab to see possible options.
Now, let's say we want to see the data livestreamed. Type exit() into itio to exit. To see live data, we can use
% tiomon
Note that the proxy server should still be running - if not, you will again have to specify the usb path. tiomon will bring up a livestream of the data specific to our device as shown below. To exit the livestream, use Ctrl-C.
    VMR - Twinleaf VMR R12 N171 [2021-03-16/c7c589]

    vector.x -1.178e+04 🕙 20.02 Hz [                                                    ]

    vector.y  7.304e+04 🕙 20.02 Hz [################################################### ]

    vector.z  2.171e+04 🕙 20.02 Hz [################################################### ]

    accel.x      0.4324 🕙 20.02 Hz [###############################################     ]

    accel.y       9.878 🕙 20.02 Hz [################################################### ]

    accel.z      0.2326 🕙 20.02 Hz [#############################################       ]

    gyro.x    2.609e-05 🕙 20.02 Hz [##########################################          ]

    gyro.y     0.009106 🕙 20.02 Hz [####################################                ]

    gyro.z     0.009131 🕙 20.02 Hz [#################                                   ]

    bar            1014 🕙 20.02 Hz [################################################### ]
Higher data rate
To obtain higher data rates, it is possible to use the data.rate command. This command sets the decimation of the first data stream such as vector.data.decimation on VMR. A decimation value of 1 provides the maximum data rate available. For VMR, the internal sample rate is 800 Hz and a decimation of 4 provides a 200 Hz data rate. On VMR R12, these commands would be equivalent:
tio-rpc data.rate f32:200

tio-rpc vector.data.decimation u32:4
and in the itio python tool, these two equivalent commands are:
tio.vmr.data.rate(200)

tio.vmr.vector.data.decimation(4)
With vector.data.autocutoff set to 1, a lowpass filter is configured according to the decimation to suppress aliasing.
It is possible to configure a data rate higher than can what fit through the the (serial/USB) interface. In this case packets of data are dropped and a warning is issued. It is possible to turn off data streams that are not needed using commands such as accel.data.active:
tio-rpc accel.data.active u8:0
or using itio/python:
tio.vmr.accel.data.active(0)
Alternatively, it is possible to decimate a portion of the data. Using tio-tools:
tio-rpc accel.data.decimation u32:10 # tio-tools
or using itio/python:
tio.accel.data.decimation(10)
Here it is critical to understand something unusual about the decimation: the streams are ordered, and the decimation is relative to the rate of the previous stream. So setting the accel stream decimation to 10 causes all of accel, gyro, bar, and therm to be decimated.
Programming With Python
It is also possible to communicate with your device via Python scripts. The tldevice module performs metaprogramming to construct an object that has methods that match the RPC calls available on the device.
Let's say we want to make a log of data from our VMR. An example script for this looks like the following:
    import tldevice

    vmr = tldevice.Device("/dev/cu.usbserial-DT04H6OM")

    file = open('log.tsv','w')

    for row in vmr.data.stream_iter():

        rowstring = "\t".join(map(str,row))+"\n"

        file.write(rowstring)
Here, our device is accessed through tldevice.Device("/dev/cu.usb-DT04H6OM"). Again, "/dev/cu.usb-DT04H6OM will be replaced by /dev/ttyUSB0 for Linux and COMx for Windows.
Labview
Another way we might communicate with our device is to use Labview. This is especially useful if we want a live graph view of the device data. For instructions on installing our Labview tools, see our Labview GUI on GitHub.
There are several example VIs available for communication with your Twinleaf device. With the VMR, we might want to have a live graph view of the sensor data. To do this, we open the VM Monitor.vi file on Labview. The VM Monitor.vi file should be located on your machine where you installed Twinleaf's Labview package. Once we open the file, the interface should look like the screenshot below. Assuming we are still running our proxy server, the specified url should be tcp://localhost as it is in the screenshot below.
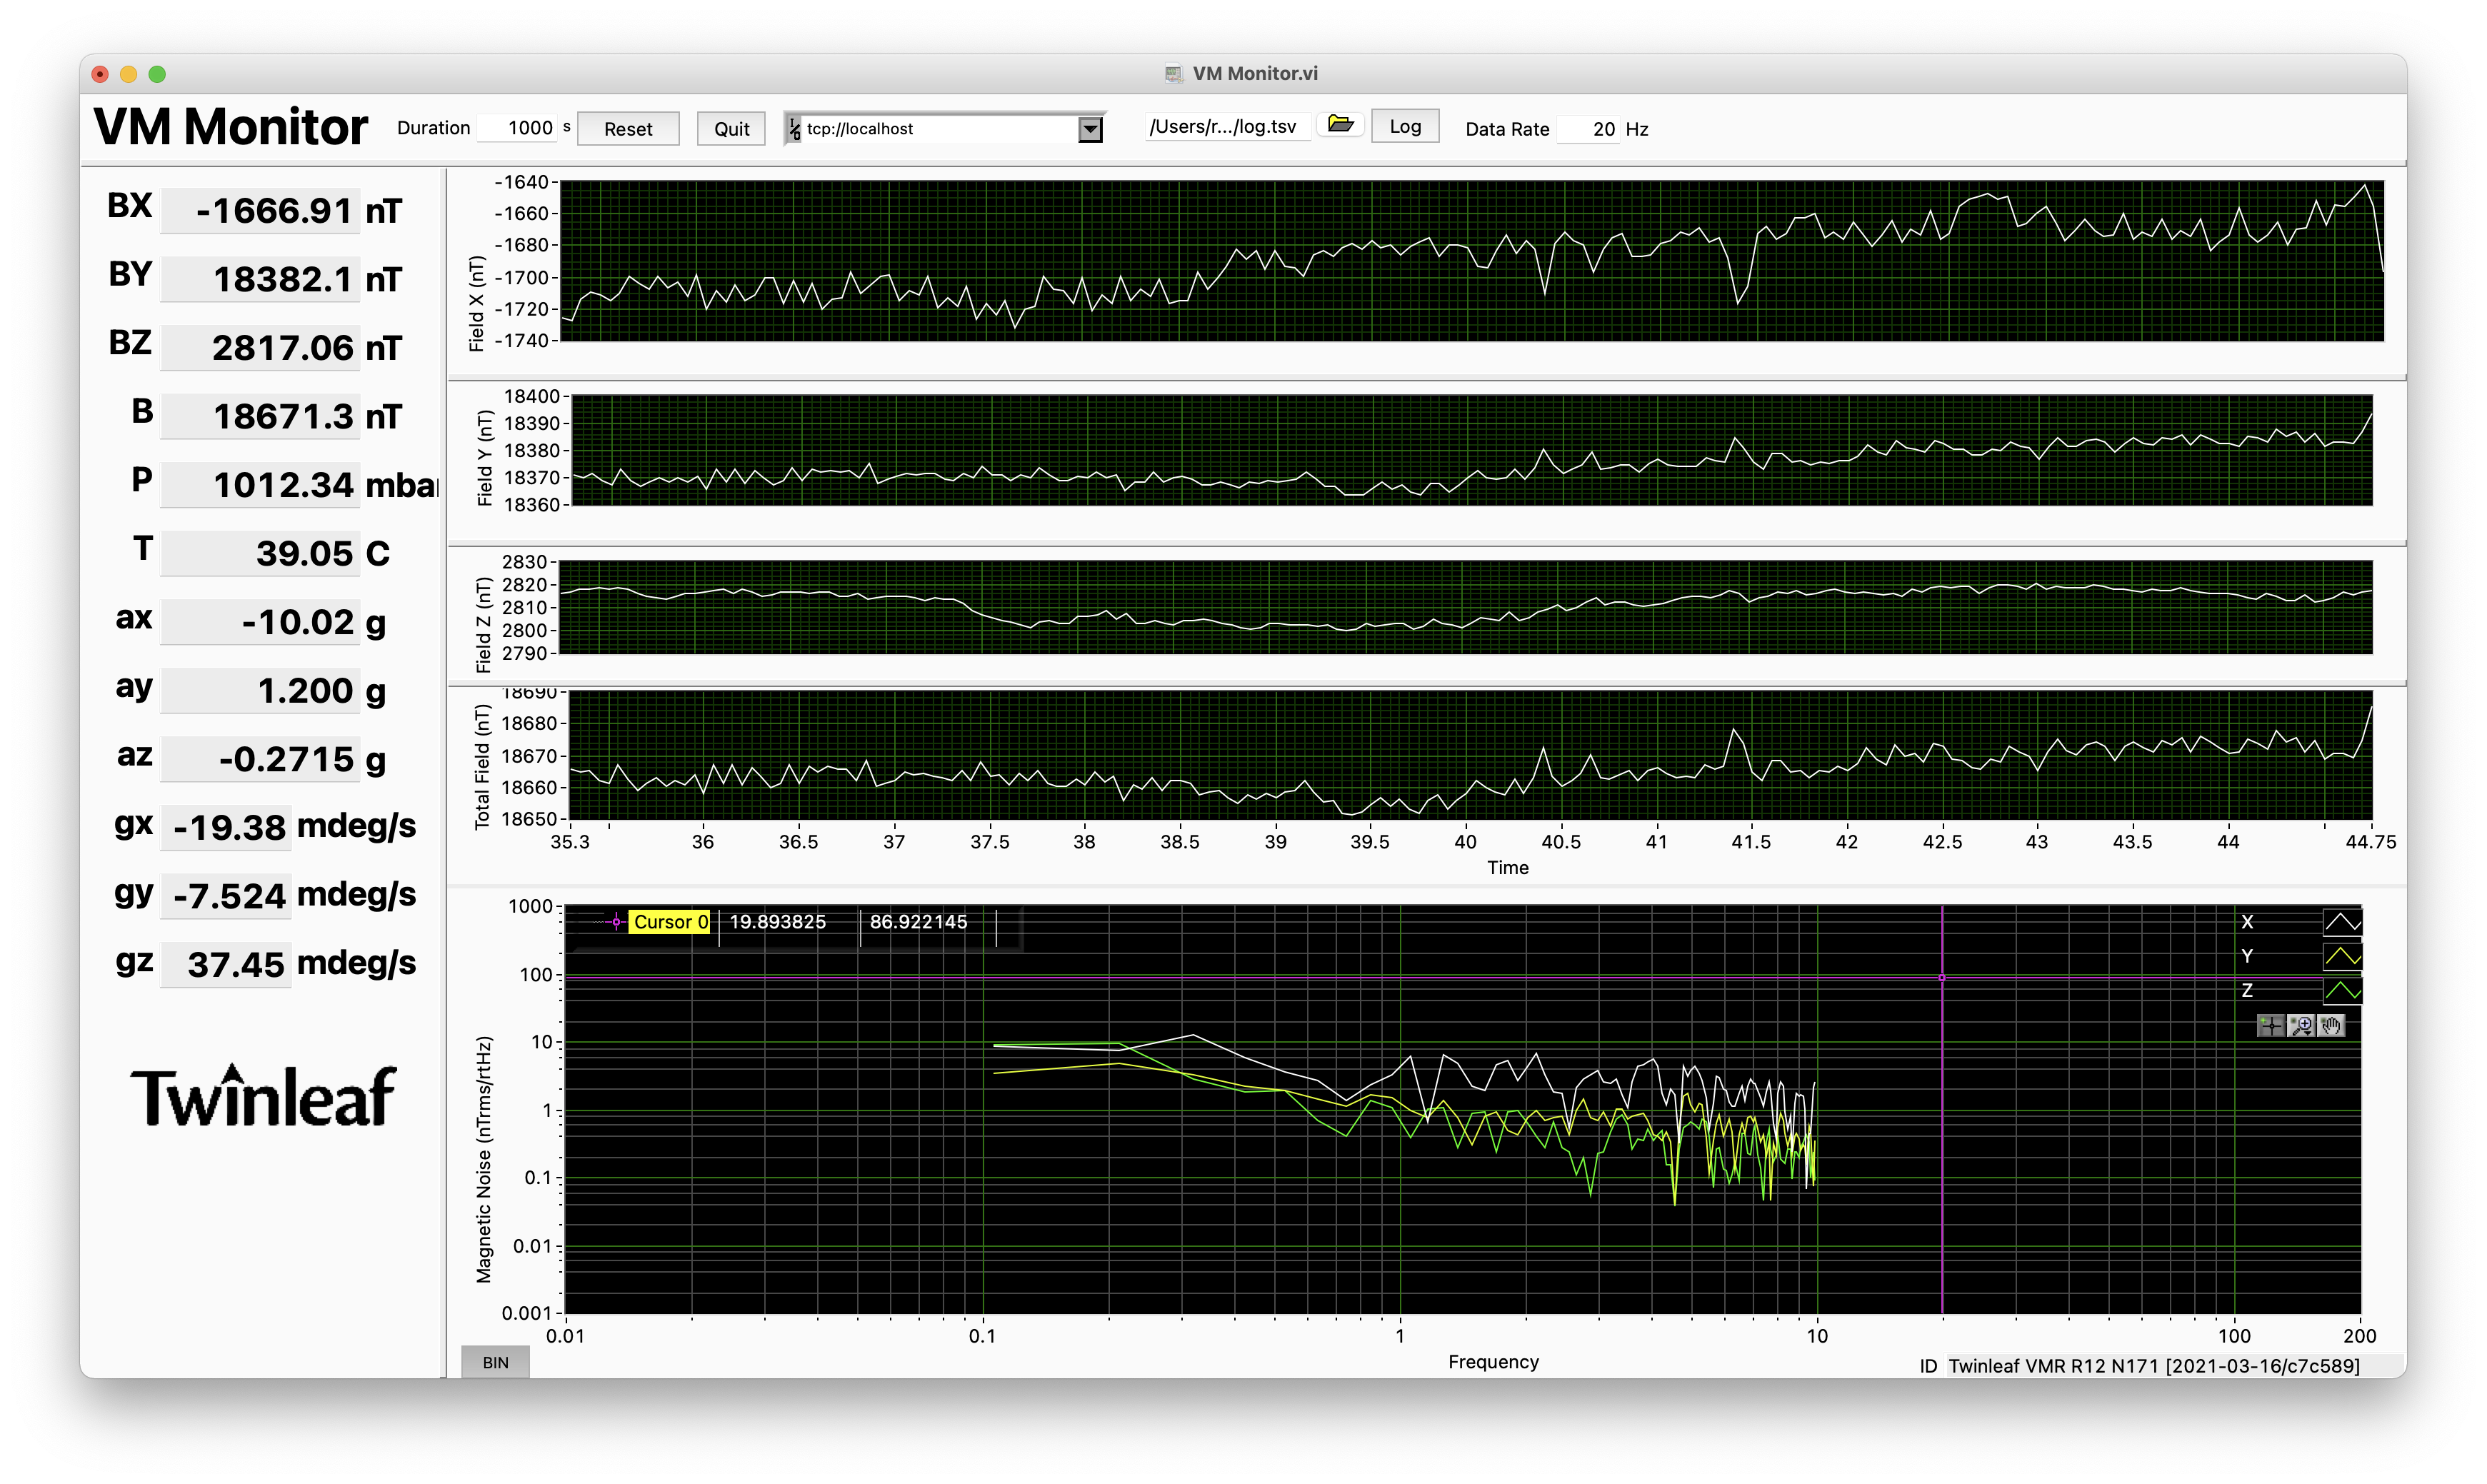
It is also possible to log the VMR data to a specified folder using this Labview GUI. Click the folder icon to specify where the log should be saved, and use the log button to start logging.